EN
 NL
 FR
 DE


John B.
Nice quality with wood veneer on 3 sides. Nice round corners. Looks very good.
Translated from DutchOnly during Black Friday. Code BF26: 15% extra off everything.
Number of LED strips: 1 LED strip
Fits
Fits our acoustic panels with standard slats.
This product does not fit the acoustic panels with wide slats.
Product information
The first kit contains one LED strip, an adapter and a remote control. You can connect up to six LED strips to one adapter; choose above how many strips you want.
The LED strip is easy to shorten. There is a black cutting line every 5 cm. Only cut on these markings to shorten the strip correctly and safely.
Please note: This product does not fit the acoustic panels with wide slats.
About this product
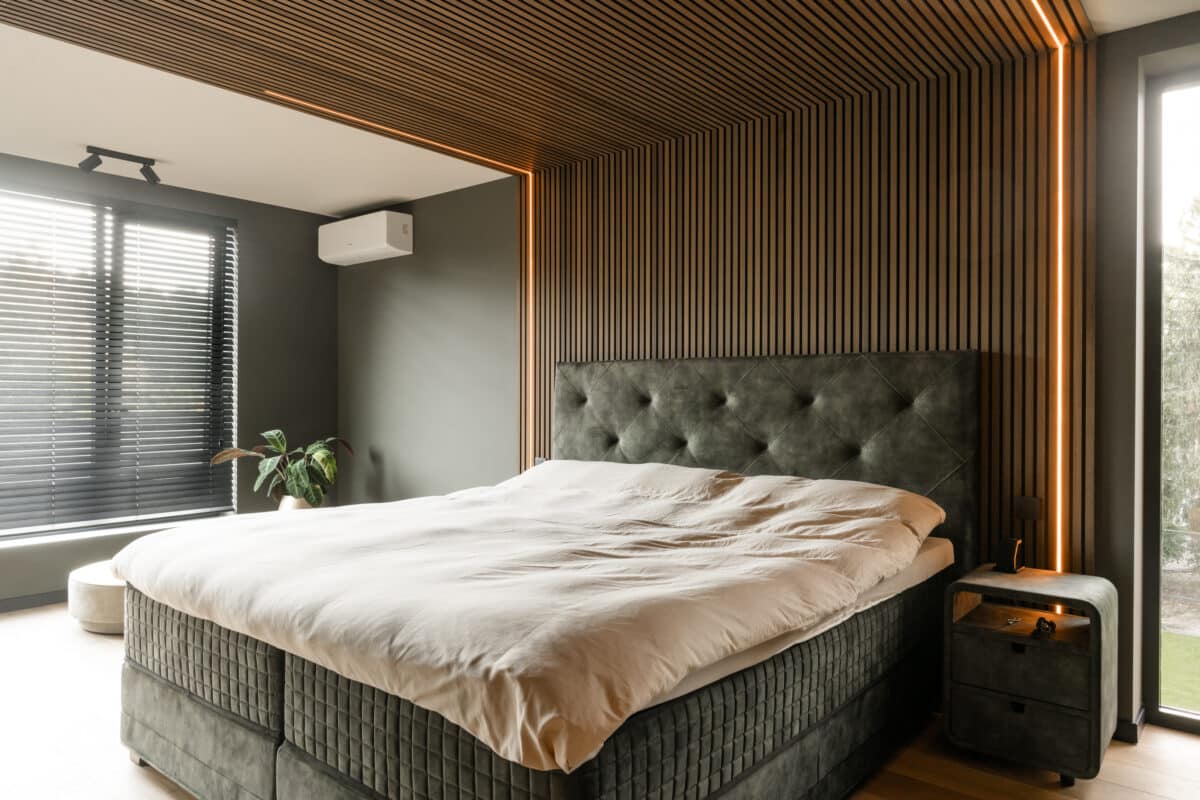
The LED strips starter kit for acoustic panels contains 1 to 6 LED strips of your choice, an adapter (the driver), a remote control and 2 metres of cable. A strip measures 260 cm, the same length as a standard 260 x 60 cm panel, and gives 3000 K warm light at 20 W. You connect all the strips from the kit to that one adapter.
Step 1: press the strip into the groove between two slats, with the wire at the top. Tuck that wire away behind the panel. Step 2: take the LED driver with plug. Step 3: connect the strip to the driver and put the plug in the socket. Step 4: hold down SET UP on the remote control until the strip flashes. Pairing has then worked.
The number of strips determines how many lines of light your wall gets, because each strip goes in its own groove. If you choose six strips, the adapter is full straight away: it cannot take more than six. With fewer strips you keep room to add more later. Because the driver has a plug, plan your illuminated wall near a socket.
You switch the light on and off with the remote control. Night mode dims the light, day mode makes it brighter. If your wall is lower than 260 cm, you shorten the strip. There are black cutting lines every 5 cm for this. Do not cut anywhere other than on one of these lines.
Installation
Shorten the strip if needed on a black cutting line (every 5 cm).
Connect the strips to the adapter, up to six per adapter.
Control the lighting with the remote control. The full steps are in the installation manual.
Reviews
Based on 1,658 reviews
John B.
Nice quality with wood veneer on 3 sides. Nice round corners. Looks very good.
Translated from DutchLamers
After we had ordered a few samples and received them, we still decided to pick up the panels ourselves so we could see the panels in their entirety ourselves. No regrets, we discovered the three-sided covered slats (a bit thicker) and a different color. Are very happy with them, even the ‘sound’ in the room sounds different.
Translated from DutchLenneke
Great
Translated from DutchRene
Ordered on a Wednesday and delivered Saturday. Amazed by the quality. Very good quality and the wood veneer also very nice.
Translated from DutchCustomer projects with our acoustic panels
The questions customers ask us most often about this product.
Disconnect the power for 10 seconds, reconnect it and press SET UP. If the strip flashes, pairing has worked. Sometimes you need to repeat this a few times.
No. They are intended for the acoustic panels with standard slats; they do not fit in panels with wide slats.
Yes, with the single LED strip without adapter. You connect it to the adapter from this starter kit, as long as you end up with no more than six strips in total.
This is how this product reaches you, and how collection by appointment works.
The full returns policy is in our terms and conditions.